
How to sew jersey & knit fabrics
- Ali Morris
- Jul 5, 2025
- 4 min read
This blog post goes with my 'sewing jersey & knits' tutorial, so you can easily reference all of the stitches I've demonstrated. If you've not taken a look at the tutorial yet, why not have a look after you've read this post.

To sew a perfectly professional jersey garment you'll need an overlocker and a coverstitch machine. However, most home sewers won't have both of these machines, so I'll show some easy alternatives you can sew on any basic sewing machine.
The photo's in this blog are all stills from my tutorial.
First things first, make sure you pre-wash your fabric as jersey does tend to shrink quite a bit on it's first wash. Then give it a good press, a bit of steam can also help to pre-shrink it as much as it's likely to shrink.
Also, if you're using a regular sewing machine, a ballpoint needle is what you need. It's not sharp like a regular needle. It means it goes past the fibres rather than piercing them. Also make sure you're needle isn't blunt on whichever machine you use, as it could mean you'll skip stitches.
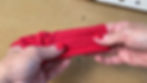
Jersey fabric can curl at the edges when you cut it, but it will lay flat fine once it's sewn correctly. Just make sure your fabric is the correct way around when cutting out. You want the stretch to go across your body, not from top to bottom (your garment will get longer if you cut it the wrong way, and won't fit so well.)
The seams
The first part of my tutorial is sewing is the seams, these are best done on a 4 thread overlocker / serger, but if you don't have one you can do a stretch stitch on a regular sewing machine. I show how to sew the various stitches, and how they perform.

This is a basic overlocker, as I say in the video, mine is an old model so they look a bit different now, but I've literally had this machine over 20 years and have used it A LOT and it's still going strong, so it's definitely a worthwhile investment, not just for jersey, but for finishing any raw edges on all of your projects.

And of course, this is how the stitch looks when sewing with 4 threads. You also have the option of 3 threads which is slightly different. (4 gives a stronger stitch for seams.) If you don't have an overlocker, the following are some alternatives.

The basic stretch stitch is a little bit bulkier and slower to sew, but it's a good alternative to a regular straight stitch which allows your knit fabric to stretch.

The lightening stitch is great as it's fairly narrow, but the way it's sewn similar to a zig zag stitch means it has plenty of stretch.

The zig zag stitch is one that every machine, however basic will sew. The narrower it is the flatter the seam will sit, the wider it is, the more stretch you will achieve. Trying out different sizes is the best way to get it right for your fabric.

The overlocking stitch on a regular machine is a great alternative to finishing your edges if you don't have an overlocker. Just make sure you don't accidentally stretch your fabric as you sew.
The hems

The coverstitch machine sews a perfect finished hem, which gives you plenty of stretch and can hide the raw edges within the stitch. The Janome Cover-pro I use in the video can be used with 1, 2 or 3 needles for a variety of stitches. 2 needles is the standard for a knit hem.

The reverse side of the 2 needle coverstitch, it has plenty of stretch, perfect for hems! The machine takes a while to get the hang of, but it's an investment I don't regret!

Sewing with a twin needle on a regular machine gives you a great hem, and it's really easy to sew. You should be able to sew with a twin needle on even the most basic of machines.

The reverse of the twin needle stitch is a little zig zag, which helps it have great stretch.
A machine sewn blind hem is another great stitch for a stretchy hem

Two variations of zig zag stitches you can use to sew a stretchy hem on jersey.

The various options for sewing a hem together. They all work really well, you're best to try out different stitches on your fabric to see which one works best.
Sewing a trim

Finally, you need to know how to finish off a neck. There are various methods, but this is a nice simple way to do it, that everyone can do with a bit of practice.

The inside looks lovely and neat too. It just needs to be pressed, and perhaps finished off with a single needle coverstitch, or any of the other stretch stitch alternatives.
There's obviously much more to cover when it comes to sewing jersey and knits, but I hope this has covered the basics if this is a totally new subject for you.
I've not intended to put too much detail in this blog, as Creative Bobbin is all about learning from video, but I hope this is a good resource to refer back to when trying to remember all the stitches and the symbols that represent them on your sewing machine.